Pages

Saturday, June 29, 2013

Spring MVC - Utility Project To Download files - Access log files from restricted environments

In development as well as maintenance projects you may have to access the log files to see what went wrong. However in some environments the developers may not have access to these log files. The developers has to request for these log files and it is a time consuming process. So if accessing log files implemented as part of the application itself it will save lot of time for the development team members.

However please note, this functionality should be used only when it is appropriate.

Technologies & Tools used

1. STS
2. Maven

Step 1:

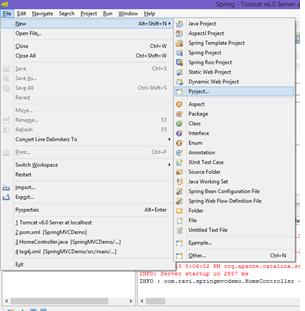
Create Spring MVC project using the steps given here

Step 2:

Add showLogs and handleFileDownload method as shown below.

1:  package com.ravi.springmvc;  
2:  import java.io.File;  
3:  import java.io.FileInputStream;  
4:  import java.text.DateFormat;  
5:  import java.util.Date;  
6:  import java.util.Locale;  
7:  import javax.servlet.http.HttpServletResponse;  
8:  import org.slf4j.Logger;  
9:  import org.slf4j.LoggerFactory;  
10:  import org.springframework.stereotype.Controller;  
11:  import org.springframework.ui.Model;  
12:  import org.springframework.util.FileCopyUtils;  
13:  import org.springframework.validation.BindingResult;  
14:  import org.springframework.web.bind.annotation.ModelAttribute;  
15:  import org.springframework.web.bind.annotation.RequestMapping;  
16:  import org.springframework.web.bind.annotation.RequestMethod;  
17:  import org.springframework.web.servlet.ModelAndView;  
18:  /**  
19:   * Handles requests for the application home page.  
20:   */  
21:  @Controller  
22:  public class HomeController {  
23:       private static final Logger logger = LoggerFactory  
24:                 .getLogger(HomeController.class);  
25:       @ModelAttribute("logFile")  
26:       public LogFile getLogFile() {  
27:            return new LogFile();  
28:       }  
29:       /**  
30:        * Simply selects the home view to render by returning its name.  
31:        */  
32:       @RequestMapping(value = "/", method = RequestMethod.GET)  
33:       public String home(Locale locale, Model model) {  
34:            logger.info("Welcome home! The client locale is {}.", locale);  
35:            Date date = new Date();  
36:            DateFormat dateFormat = DateFormat.getDateTimeInstance(DateFormat.LONG,  
37:                      DateFormat.LONG, locale);  
38:            String formattedDate = dateFormat.format(date);  
39:            model.addAttribute("serverTime", formattedDate);  
40:            return "home";  
41:       }  
42:       @RequestMapping("/showlogs")  
43:       public ModelAndView showLogs() {  
44:            return new ModelAndView("logs", "command", new LogFile());  
45:       }  
46:       @RequestMapping(value = "/logs")  
47:       public void handleFileDownload(@ModelAttribute("log") LogFile log,  
48:                 BindingResult result, HttpServletResponse res) throws Exception {  
49:            try {  
50:                 String fn = log.getLogFileLocation();  
51:                 File f = new File(fn);  
52:                 System.out.println("Loading file " + fn + "(" + f.getAbsolutePath()  
53:                           + ")");  
54:                 if (f.exists()) {  
55:                      res.setContentType("application/text");  
56:                      res.setContentLength(new Long(f.length()).intValue());  
57:                      res.setHeader("Content-Disposition",  
58:                                "attachment; filename=Test.log");  
59:                      FileCopyUtils.copy(new FileInputStream(f),  
60:                                res.getOutputStream());  
61:                 } else {  
62:                      System.out.println("File" + fn + "(" + f.getAbsolutePath()  
63:                                + ") does not exist");  
64:                 }  
65:            } catch (Exception e) {  
66:                 System.out.println(e.getMessage());  
67:                 throw e;  
68:            }  
69:       }  
70:  }  

Step 3

Add the JSP file which allows the user to download to specific log file.

1:  <%@taglib uri="http://www.springframework.org/tags/form" prefix="form"%>  
2:  <html>  
3:  <head>  
4:       <title>Spring 3 MVC - Log Manager</title>  
5:  </head>  
6:  <body>  
7:  <h2>Log Manager</h2>  
8:  <form:form method="post" action="logs.html">  
9:       <table>  
10:       <tr>  
11:            <td><form:label path="logFileLocation">Log File Location</form:label></td>  
12:            <td><form:input path="logFileLocation" /></td>   
13:       </tr>  
14:       <tr>  
15:       </tr>  
16:       <tr>  
17:            <td colspan="2">  
18:                 <input type="submit" value="Fetch Log"/>  
19:            </td>  
20:       </tr>  
21:  </table>       
22:  </form:form>  
23:  </body>  
24:  </html>  

Step 4

Run the application and the application can be accessed in the url http://localhost:8080/springmvc/showlogs


Step 5

Your log files will be downloaded as shown below.


This tutorial is for illustration purposes only. Do not use this in real life scenario without adding specific security measurements as this application will allow you to download all the files for which the user has access to.

Step by step Spring MVC application development using Spring Tool Suite in 2 minutes

In this tutorial we will see creating a Spring MVC application using Spring Tool Suite IDE in 2 minutes

Step 1 : Create new new project by choosing File -> New -> Project


Step 2 : Choose Spring Template Project


Step 3 : Choose Spring MVC Project

Step 4 : Choose a name for the project - SpringMVCDemo


Step 5 : The project structure should look like the one below

Step 6 : Add the project to Tomcat server integrated with STS and start the server


Step 7 : The application should be up and running and you can access the application in the below URL


Spring 3 Hello World Example

Spring 3 Hello world example

Technologies used

STS
Maven
JDK 1.6

POM file

1:  <project xmlns="http://maven.apache.org/POM/4.0.0" xmlns:xsi="http://www.w3.org/2001/XMLSchema-instance"  
2:       xsi:schemaLocation="http://maven.apache.org/POM/4.0.0 http://maven.apache.org/maven-v4_0_0.xsd">  
3:       <modelVersion>4.0.0</modelVersion>  
4:       <groupId>com.ravi.helloworld</groupId>  
5:       <artifactId>Spring3HelloWorld</artifactId>  
6:       <packaging>jar</packaging>  
7:       <version>1.0-SNAPSHOT</version>  
8:       <name>Spring3HelloWorld</name>  
9:       <url>http://maven.apache.org</url>  
10:       <properties>  
11:            <spring.version>3.2.3.RELEASE</spring.version>  
12:       </properties>  
13:       <dependencies>  
14:            <dependency>  
15:                 <groupId>junit</groupId>  
16:                 <artifactId>junit</artifactId>  
17:                 <version>4.8.2</version>  
18:                 <scope>test</scope>  
19:            </dependency>  
20:            <!-- Spring 3 dependencies -->  
21:            <dependency>  
22:                 <groupId>org.springframework</groupId>  
23:                 <artifactId>spring-core</artifactId>  
24:                 <version>${spring.version}</version>  
25:            </dependency>  
26:            <dependency>  
27:                 <groupId>org.springframework</groupId>  
28:                 <artifactId>spring-context</artifactId>  
29:                 <version>${spring.version}</version>  
30:            </dependency>  
31:       </dependencies>  
32:  </project>  

The source code looks like this

1:  package com.ravi.helloworld;  
2:  import org.springframework.context.ApplicationContext;  
3:  import org.springframework.context.support.ClassPathXmlApplicationContext;  
4:  public class App {  
5:       public static void main(String[] args) {  
6:            ApplicationContext context = new ClassPathXmlApplicationContext(  
7:                      "AppContext.xml");  
8:            HelloWorld obj = (HelloWorld) context.getBean("welcomeBean");  
9:            obj.printHello();  
10:       }  
11:  }  

The application context file

1:  <beans xmlns="http://www.springframework.org/schema/beans"  
2:       xmlns:xsi="http://www.w3.org/2001/XMLSchema-instance"  
3:       xsi:schemaLocation="http://www.springframework.org/schema/beans  
4:  http://www.springframework.org/schema/beans/spring-beans-3.0.xsd">  
5:       <bean id="welcomeBean" class="com.ravi.core.HelloWorld">  
6:            <property name="name" value="Ravisankar" />  
7:       </bean>  
8:  </beans>  

When you run it the output will look something like this
1:  Spring 3 : Hello ! Ravisankar  


Sunday, June 16, 2013

Testing Spring MVC application - Spring 3

Testing Spring MVC application is always bit tricky because the test support is not that great for MVC. This weekend when I was searching for options to test, I stumbled across this spring-test-mvc framework which is now integrated with Spring-test module from 3.2.3.Release version on wards.

I tested it using a quick example and it looks impressive to start with. Lets see how to use this to test your application.

Add this dependency in your POM file

<dependency>
<groupId>org.springframework</groupId>
<artifactId>spring-test</artifactId>
<version>3.2.3.RELEASE</version>
<scope>test</scope>
</dependency>

Create a new test class for your controller. The sample controller looks something like this.

package com.ravi.springmvc;

import static org.springframework.test.web.servlet.request.MockMvcRequestBuilders.get;
import static org.springframework.test.web.servlet.result.MockMvcResultMatchers.status;

import org.junit.Before;
import org.junit.Test;
import org.junit.runner.RunWith;
import org.springframework.beans.factory.annotation.Autowired;
import org.springframework.test.context.ContextConfiguration;
import org.springframework.test.context.junit4.SpringJUnit4ClassRunner;
import org.springframework.test.context.web.WebAppConfiguration;
import org.springframework.test.web.servlet.MockMvc;
import org.springframework.test.web.servlet.setup.MockMvcBuilders;
import org.springframework.web.context.WebApplicationContext;

@RunWith(SpringJUnit4ClassRunner.class)
@WebAppConfiguration
@ContextConfiguration("classpath:test-servlet-context.xml")

public class HomeControllerTest {

    @Autowired
    private WebApplicationContext wac;

    private MockMvc mockMvc;

    @Before
    public void setup() {
        this.mockMvc = MockMvcBuilders.webAppContextSetup(this.wac).build();
    //this.mockMvc = MockMvcBuilders.standaloneSetup(new HomeController()).build();
    }

    @Test
    public void getAccount() throws Exception {
    this.mockMvc.perform(get("/showlogs")).andExpect(status().isOk());
    }

}

There are two options to test 

1) With all your configurations, just like the above code. You can load your spring configuration file so that you can even see whether there are any issues in your configurations. 
2) As a standalone test without loading any configurations.  You can strip away all the configuration loading part and still test the application. Pretty impressive.

MockMvc is the core part of the test framework and as the name suggests mocks the MVC setup. When you call webAppContextSetup by passing WebApplicationContext you get the MockMVC instance. 

        this.mockMvc = MockMvcBuilders.webAppContextSetup(this.wac).build();

In that you can call perform method with the url to mimic the browser behavior of calling a particular URL path. 

     this.mockMvc.perform(get("/showlogs")).andExpect(status().isOk());

After the perform method you can test your expectations and basic one is whether the page returns ok by checking the http status code.

Standalone setup is even pretty simpler.

package com.ravi.springmvc;

import static org.springframework.test.web.servlet.request.MockMvcRequestBuilders.get;
import static org.springframework.test.web.servlet.result.MockMvcResultMatchers.status;

import org.junit.Before;
import org.junit.Test;
import org.springframework.test.web.servlet.MockMvc;
import org.springframework.test.web.servlet.setup.MockMvcBuilders;

public class HomeControllerTest {

    private MockMvc mockMvc;

    @Before
    public void setup() {
     this.mockMvc = MockMvcBuilders.standaloneSetup(new HomeController()).build();
    }

    @Test
    public void getAccount() throws Exception {
    this.mockMvc.perform(get("/showlogs")).andExpect(status().isOk());
    }

}

Sunday, June 9, 2013

SCEA - Sun Certified Enterprise Architect - Oracle Certified Master, Java EE 5 Enterprise Architect

I want to share my experience of becoming an SCEA or now OCM for Java. I guess SCEA was the ultimate goal for many java developers who wanted to become architects.

When I started the preparations in 2010, it was SCEA which had 3 parts

1) Online test
2) Assignment
3) Essay

Now it became OCM - Java EE 5 and they introduced a training as well before online test for a hefty price in the range of $2000-$3000. I am not sure whether people are really interested in this exam any more.

The online test - It is a multiple choice question for 2 hours. It contains 64 questions and passing score is 57%. We need to prepare for 8 topics

1) Section 1: Application Design Concepts and Principles
2) Section 2: Common Architectures
3) Section 3: Integration and Messaging
4) Section 4: Business Tier Technologies
5) Section 5: Web Tier Technologies
6) Section 6: Applicability of Java EE Technology
7) Section 7: Patterns
8) Section 8: Security

This exam can be daunting but I found it rather not very difficult once you really start the preparation. You can prepare with the materials you have in online. Code ranch has a wonderful forum where you can find wealth of information ( http://www.coderanch.com/t/562482/java-Architect-SCEA/certification/suggestions-SCEA-preparation ). I also bought the exam kit from whiz labs ( http://www.whizlabs.com/scea/scea.html ) where you can practice and it will clearly let you know the areas of improvement. It had multiple mock exams and you can try 2 or 3 before the final day of the exam. On the final day or day before that, try the remaining two.

I took the exam in Sep 2010 and I passed the exam with 80% score and then I didn't attempt the essay exam for one year. When I took it up in Jan 2012 I used the book Certified Enterprise Architect Study Guide (http://www.amazon.com/Certified-Enterprise-Architect-Study-Guide/dp/0131482033) and it was ultimate. The reason is, the book is not very big and it was written by the exam authors themselves. So the assignment examples published in the book are pretty simple and neat. I just used this book as guide and prepared for the exam. Once you pay the money for exam, earlier they used to send the assignment in mail which you need to complete and upload in the website. I guess now it is changed.

I was very worried about the assignment but it is not that hard. But it needs time as you need to prepare each and every diagram with enough details.

1) Class diagram
2) Sequence diagram - You have to prepare many for each use case
3) Component diagram
4) Deployment diagram (I found a nice example in weblogic server site but I could not find it now)

I used Enterprise Architect tool to create these diagrams.  You can use Rational tools as well. I am not sure are there any good open source tools also to do this. Again you can get plenty of advice on Code ranch. You can't discuss about your exact problem but you can get the general questions clarified. Finally I completed the assignment after one week of hard work (I took off from office and worked on it for a week) and uploaded.

Then the final essay exam. You need to take the exam in authorized center and it mainly talks about the design choices you made and your deliverables. This one is easy if you take this exam with in a week of your submission. No need to prepare anything you just go to the center and then say it in writing the reasons behind your architecture or design. I did it with in a week and then waited for the result.

Whola, after a week I got the most anticipated mail that I have cleared the exam. But unfortunately I waited for too long to take the assignment exam so I also need to go through the class room training to get my final certification. It is so costly (costlier than all the 3 exam's put together) I am wondering whether to take it or not.

Now everything moved towards Scrum, Agile and Spring so I am wondering whether this exam has the same popularity and respect it used to have once. I am not creating class diagram, sequence diagrams any more and also not using the Java EE stack at all. This training only suitable for people who are 3-4 years experience in Java but not for people who have more than 10 years experience (SE 7 is one training!!!).


Saturday, June 8, 2013

Professional Java Development Environment

When I am a fresher, just out of college looking for a Job, I always used to wonder what kind of tools, practices a professional developer use for development. Now as a professional developer I am very much used to this but thought of sharing the knowledge to others.

In Java there are many tools, frameworks to master. I am just listing down the most commonly used.

Development Tools

1.IDE - Integrated Development Environment - Eclipse - The de-facto standard in many development environments. Such a useful tool to create your code. No need to remember the API's. It will automatically suggest it for you so need to worry about it. - http://www.eclipse.org/

2. Source Control System - SVN - This version control system is very popular among the serious developers because it is very easy to use and also free of cost. - http://subversion.tigris.org/

3. Build Tool - Maven - Maven is very popular among the development community because of its ability to pull all the required Jar files once you declared them as dependency for your project. http://maven.apache.org/

4. Continuous Integration - Hudson - This continuous integration software allows your project to build on a regular basis and provides the necessary metrics once you configure the plug-ins. http://hudson-ci.org/

5. Reporting - Sonar - This reporting system, analyses the source code and generates various reports useful for the development team to correct the issues in the code. http://www.sonarsource.org/

So if you setup your development environment using the above tools, you have a environment which resembles the environment setup by any professional developer.
 
Blogger Templates